
In this post, I will be describing a step by step guide to set up a wordpress site in your local computer and continue with the development.
Prerequisites
MySql server and Wamp server should be installed properly and configures in your computer. MySql will be installed automatically when you install Wamp. This tutorial is for windows 7 platform.
Step 1
Download the latest and the stable Wordpress setup from the website. here is the Link. Wordpress is completely free. So no need to worry about money.
Step 2
Go to your www folder (path = C:\wamp\www) and create a folder called "Demo" .I'll be using this folder further in this tutorial in-order to explain. You can create a folder with any name you wish.
Step 3
Now extract all the files in the downloaded zip file and paste those extracted files in the "Demo" folder.

Step 4
Now make sure the wamp server and the mysql server are up and running.Easiest way to do that is to check the wamp server icon in the Windows task bar. If it is green, that means server is running without any issues.If not then you might have check the server again.

Step 5
Now open your favorite browser and visit this URL, "http://localhost/Demo". I would suggest Chrom or firefox for wordpress development. When you visit that url, you will be automatically redirect to another url, "http://localhost/Demo/wp-admin/setup-config.php".
Select you prefered language and the click "Continue".

Step 6
You will be able to see the below screen next.

Before clicking the "Let's go!" button, we need the following details.
- Database name
- Database username
- Database password
- Database host
- Table prefix (if you want to run more than one WordPress in a single database)
Visit this url "http://localhost/phpmyadmin/" and go to your "phpmyadmin" page. Create a data base and use that database name as the above mentioned "Database name".Use the username and password of your mysql server as the "Database username" and "Database password".Host would be "localhost" since you are developing in your local machine.Use any matching value as the "Table prefix".After finding all those details, click "Let's go!" button.
Step 7
Now fill all the details in the below screen and click "Submit".

Step 8

Now Click "Run the install".
Step 9
Now fill the details of the next screen. It should be filled with the details which is related to the website you are going to build.Then click "Install Wordpress".


Step 10
Now you will be redirected to the Success page after the installation is finished.
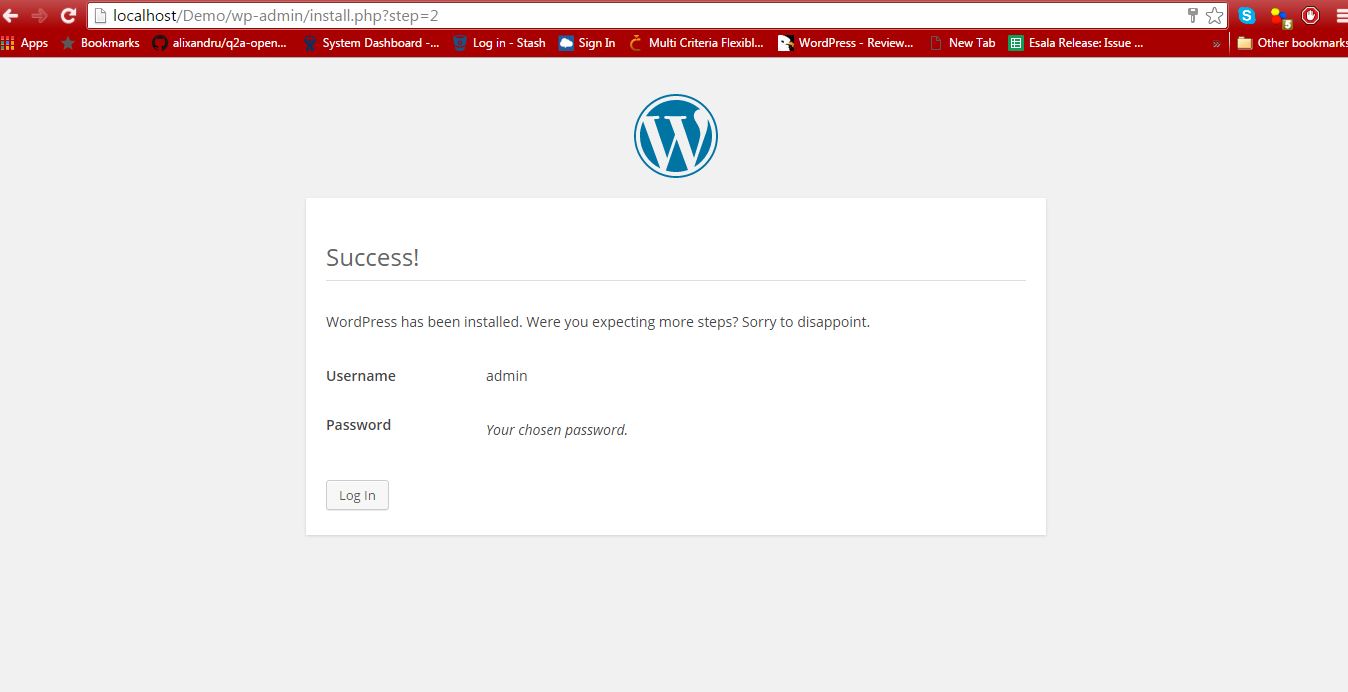
Now Click "Log in". Then you will be able to see the Login page for your locally set upped wordpress site.Enter the credentials and then Login.As the last step,you should be able to see the dashboard of the local wordpress site.


If you were able to go though all the steps i have mentioned without a issue,that means wordpress website up and running. You can cntinue your website development from here.
I have explained all the steps as simple as possible. But still you might face some difficulties when setting up wordpress for the first time.Please mention those in comments section and i'm really happy to answer those.
0 comments:
Post a Comment